Removing A broken bolt

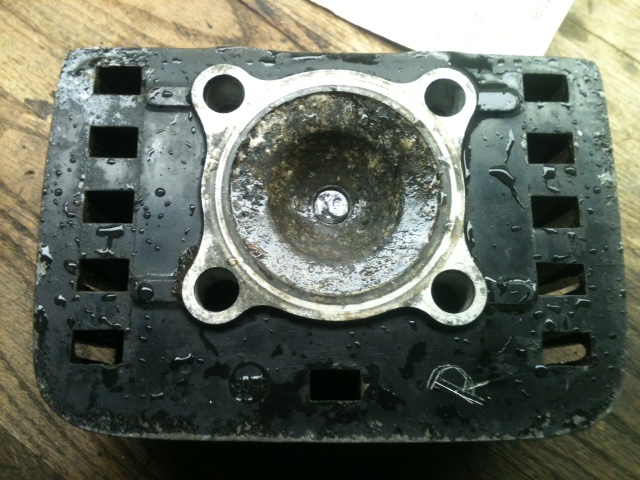
If you turn a wrench on an old bike for more than 5 min you bound to find a broken bolt, stripped threads, or rounded fasteners. We’ll be removing a broken spark plug from a head. A few of the things working against us here are: Dissimiler metal corrosion with the plug being steel and the head aluminum,the fact that this head hasn’t been on a running bike since 81′  and was sitting in upstate ny it’s whole life.

As you know my cases and heads are out in Oregon getting vapor blasted. Guy sent me some pics and they look great. Bad thing is the $6.50/hr truck unloader at fedex doesn’t give a shit about my parts and they arrived In Oregon with a broken fin. I had an extra head but it still had this broken plug in it and I had tried simpler methods of removing it weeks before to no avail.

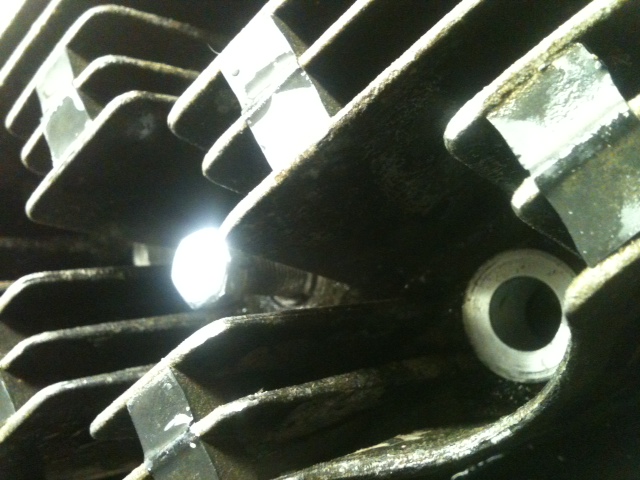
Theres lots of ways to remove a broken bolt, but my favorite is to weld a new bolt to it to allow use of a socket and the bonus of this method is the added heat cycling from the welding itself. First I drilled the old plug out to the same size as a junk bolt I had, this case it was 3/8. This allowed me to put the bolt in and get a good weld on the freshly drilled metal.

Underside of head with bolt welded to offending plug

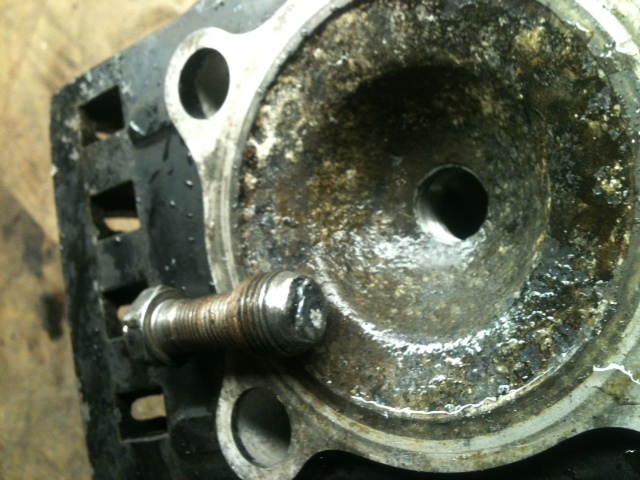
Top of new "spark plug remover tool"

At This point I heat cycled the head a few more times with a propane torch for extra piece of mind and went ahead with the removing. As you can see It came right out first try.

Plug remover with the threads of the old plug visible on the end

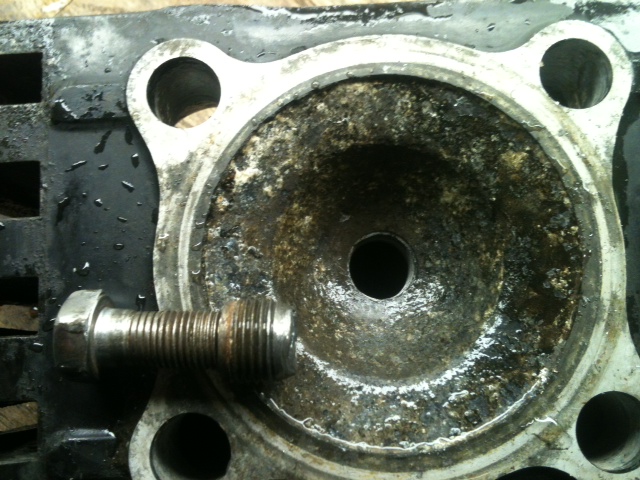
I was  pretty pleased that it came out easily without damaging the threads badly. Since my tap and die selection is pretty weak right now and I didn’t have the correct plug thread tap I did the next best thing. This works especially well for the CEI and WHITWORTH fasteners because I don’t have ANY of those taps. I found an old spark plug and coated the threads with valve lapping compound. Slowly I threaded the plug in by hand working it in and out. Removing all the crud and corrosion out of the threads from 30 years of sitting. Plug now goes in and out freely.

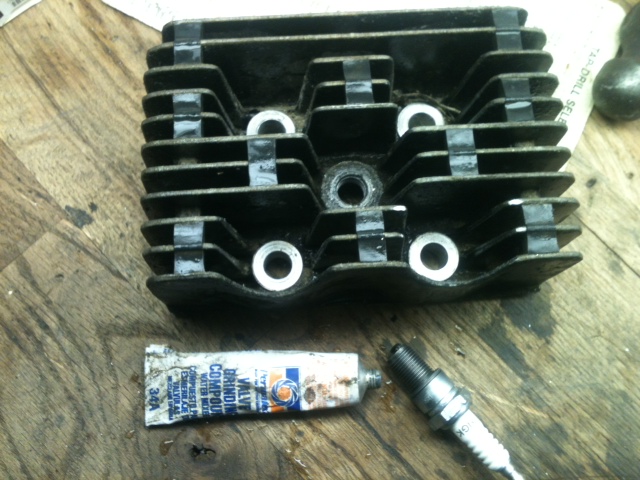
All that's needed for the trick

If you are ever in going to get some Vapor Blasting done. I HIGHLY recommend Jeff. First class dude

Rd350 built up crank assembly

A few of you may of seen the pair of RD350’s I picked up a few weeks ago and there subsequent tear down. This will document the rebuild of the crankshaft. As I type the cases are out in Oregon being vapor blasted HERE, a process similar to glass beading except that its done with a slurry and produces a superior finish that doesn’t stain as easily and looks like the day the part was cast. In the meantime I have been sussing out different things on the bike and gearbox, removing unesscary tabs on the frame and collecting parts for the rebuild.

Having dissembled the the crank to inspect,I found out I would need new connecting rods and bearings in addition to the 4 main bearings that support the crank.

CRANKPINS, the big ends of the rods were just as trashed as well as some bluing form heat


While I neglected to take photos of pressing the crank apart it is almost the same as reassembly.

All apart with the pieces that will make it new again, also note the slotted con rod for better oiling

objectives are: Make special fixture to support the crank while pressing it apart and not bend the rods.

Almost fold the press and or explode my push bar to sepiarate the center webs that have been married for 40 years.

Catch crank halves as they fire out the bottom of the press.

All this has been accomplished by the simple fixture I made out of some large square tube with a half a dozen rags stuffed in the end and a plate with an notch cut out for the crank pin to sit.Crank pin in, rod and bearings and thrust washers on

The most difficult part of reassembly is pressing the two sub-assembles together while maintaining the rod side clearance at .001-.003 You can’t see from the pictures how I accomplished this with two pieces of bar between the crank webs. This proved difficult as the clearance I wanted to maintain went away to almost nothing, at least it prevented me from bending the crank pins! Because of this I had to reset the side clearances, not  big deal but a little harder than while it was still the sub-assemblys.  This is the point where I began to get frustrated and stopped with the photography class. After a bit more futzing around I was left with an assembled crank. Next installment will be truing the crank, STAY TUNED!