Cars and trucks are a necessary evil. With that said, if you’ve gotta have one (and motorcycles were my sole transportation in life until a few years ago) you might as well have a cool one that can haul motorcycles if necessary. I’ve had a ’59 Chevy Apache for about five years now. It was pretty raw, but evolves slowly as I make incremental improvements. This latest round had me adding a vacuum advance and rebuilding the stock AC/Delco distributor to house a much more recent vintage HEI ignition. The idea and motivation came from Young Dan, who had done it to his ’59 Ford. Thanks Dan.
Per my usual approach, I did my best to hide these modifications and to use as many original or factory parts as possible. It’s not like you can’t tell it’s there, but I didn’t want some big honking red MSD box hanging off the motor either. Wouldn’t seem right. So about two weeks ago we were hanging around the shop and I dug in. Ripped the distributor out after marking some reference points and started taking things apart. Up until that point I had been running fixed timing as I’d previously welded the two timing clamp pieces together due to a shot advance can. A little surgical grinding and they were free again and ready for reuse.
Without getting too much into it, here’s a little background on what changes were made. You can lookup the benefits of vacuum advance elsewhere. The HEI controller is a contact-less pickup and coil controller (makes the coil fire the plugs at the right time) that costs about $20 at any auto parts store. Dime a dozen. Easy to replace. These means no more setting points, more stable ignition, smoother idle and no regular adjustments of any sort required.
Parts used were the stock Delco distributor, a new advance can, a Chrysler slant-six reluctor and pickup and an aftermarket HEI controller and heat sink. I think the whole project cost around $60.
It came out great. Starts right up and runs like a whole new truck. Details in the pictures.
Jason
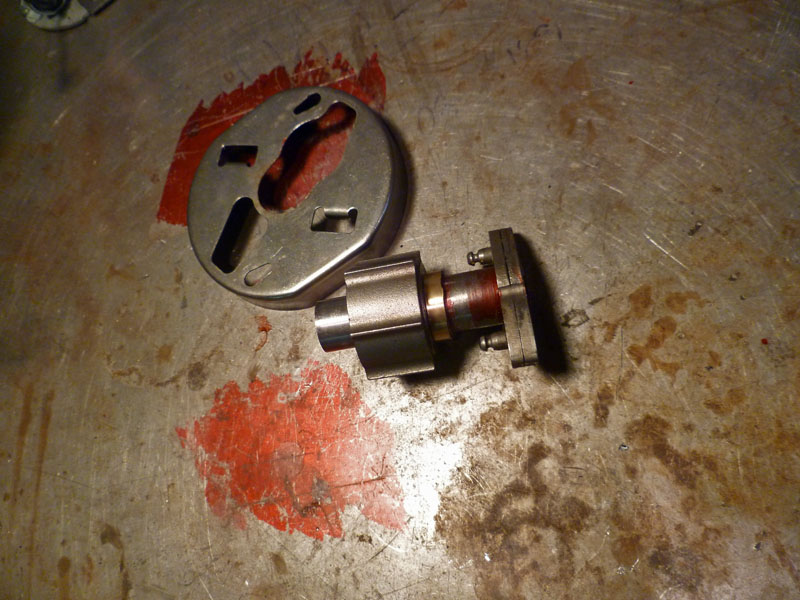
First step was to remove the point cam and grind/file it down as round as possible. Couldn’t use a cutter on the lathe as this part is hardened and precision ground. Once reasonably round, I made a somewhat thin brass bushing and pressed it over the eccentric area. The bushing deformed to some extent, which is what I wanted. Then I mounted the part in the lathe and turned the bushing perfectly round for an interference fit with the reluctor. Some people use epoxy to mount the reluctor, which might be perfectly functional, but you know I don’t glue things together in the shop! I was careful to mount the reluctor peaks where the old point cam peaks were for proper indexing.
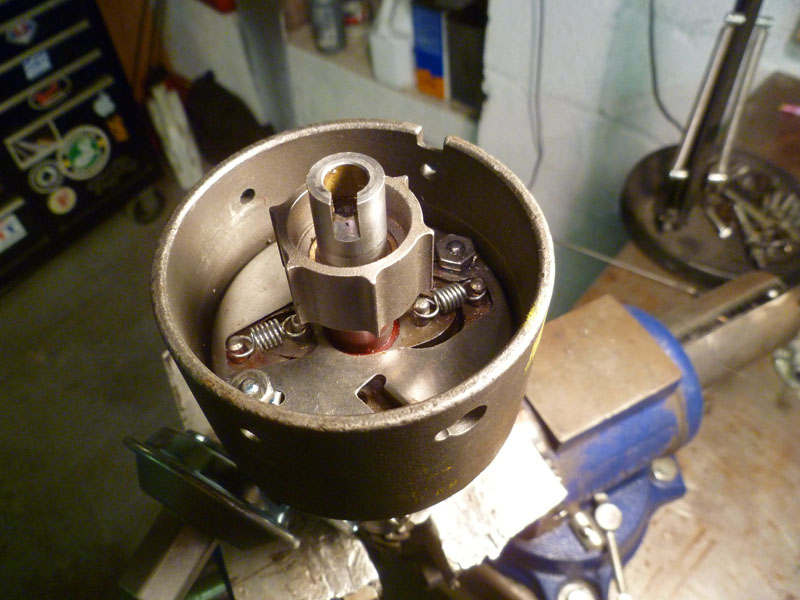
The newly modified reluctor carrier mounted in the distributor with the centrifugal advance weights rebuilt and checked. This particular weight set allows for 31deg of mechanical advance (actuated by increased rpm).
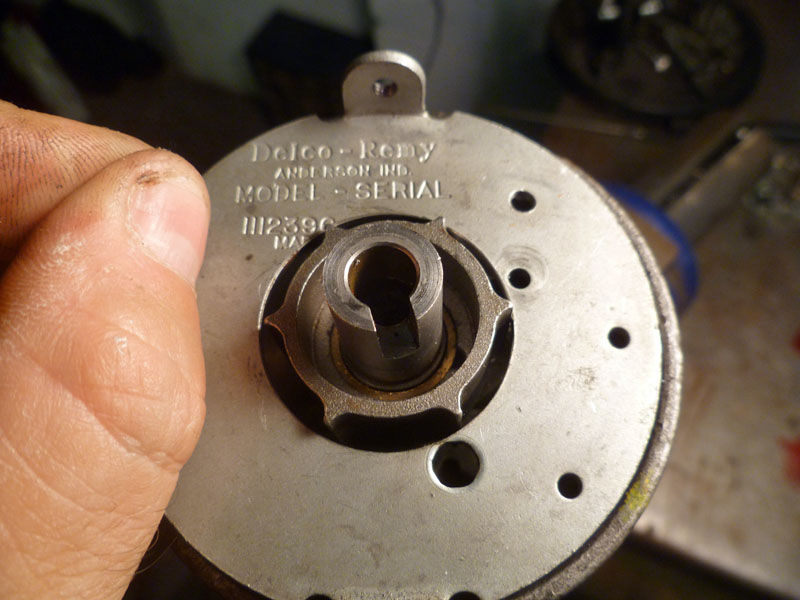
I had to machine the original points plate so that it would fit over the new reluctor while still allowing for mounting the reluctor pickup. One requirement of this project was that all internal parts still be serviceable. Some people (you know who you are) install the reluctor after the weights and plate are installed, leaving you with a permanent alteration and no way to service the weights in the future.
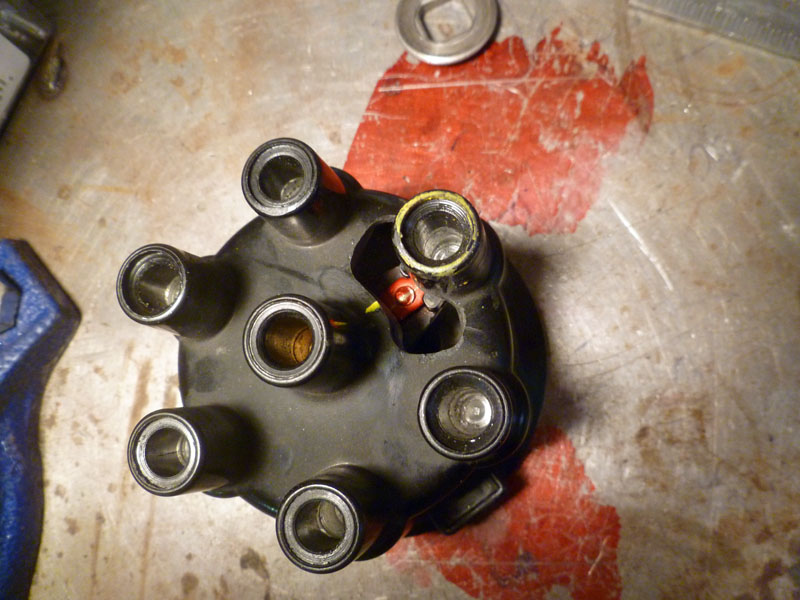
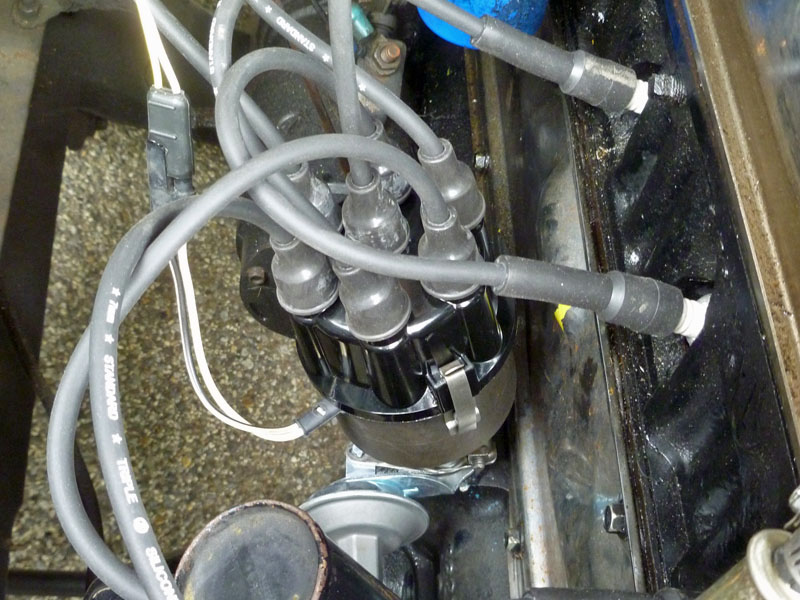
One of the challenges of this conversion was to index the contact rotor (which carries the secondary coil voltage to the appropriate spark plug wire post) properly so that it is adjacent to an internal terminal post when the coil fires. Seems it’d be tough to figure just where the rotor was while setting things up so I made an inspection cap with a hole hogged out (technical term) in it. This made things much easier. Note the scribed line on the rotor and reference marks in yellow on the cap. This allowed me to check rotor phasing while the motor was running with a timing light after all the other work was completed.
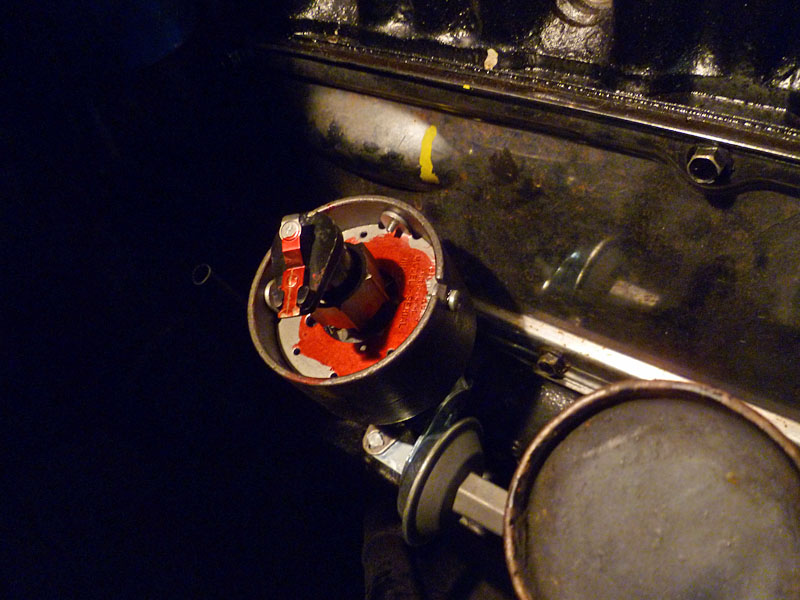
Setting up the distributor in the motor so that I could assess where to mount the reluctor pickup. The distributor body is in the desired orientation with the shaft oriented such that the the rotor is pointing to the #1 cylinder post on the cap (now removed). I scribed lines in the point carrier plate opposite each crest in the reluctor. These were to be my guidelines for mounting the pickup correctly.
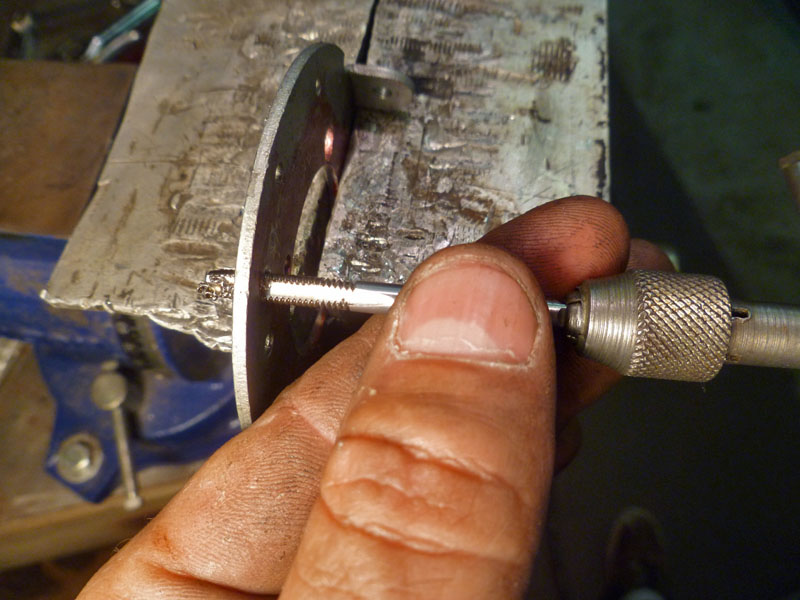
Much more work implied here than shown. . . coming up with an adjustable and properly indexed pickup mount mechanism was pretty tricky. There’s not a whole lot of room in there and the original brackets on the pickup were much too large. I had to make up a new two-piece pickup mount bracket that allowed the reluctor gap to be set and the rotational position to be adjusted for proper rotor phasing. Next pics shows the setup. Shown here is tapping the mounting holes for 8-32 hold-down screws after their locations were determined.
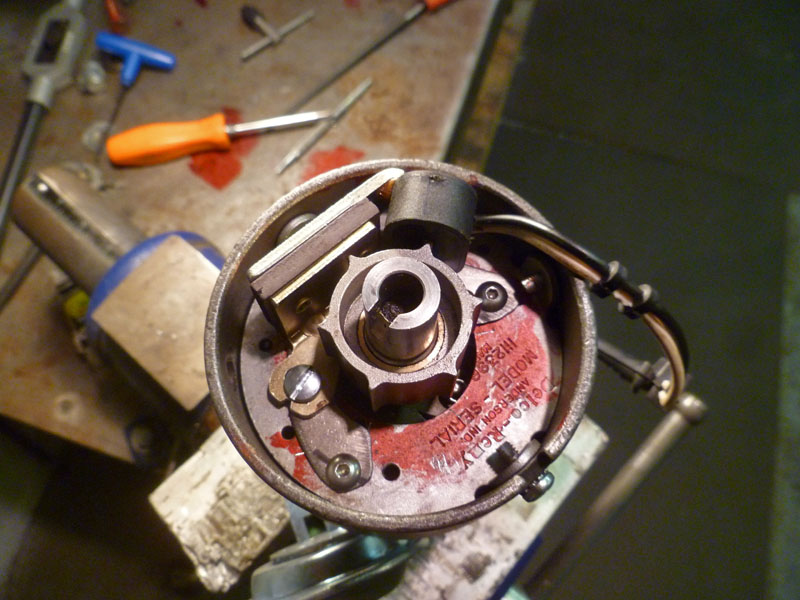
The new pickup mounting arrangement. Allows for gap and phasing adjustment while fitting within the original distributor space. The slotted screw is for gap adjustment with the other end pivoting on a rivet to the plate below. The button-head screws are for phasing adjustment, with the underlying holes elongated by a few degrees each. Close fit, eh?
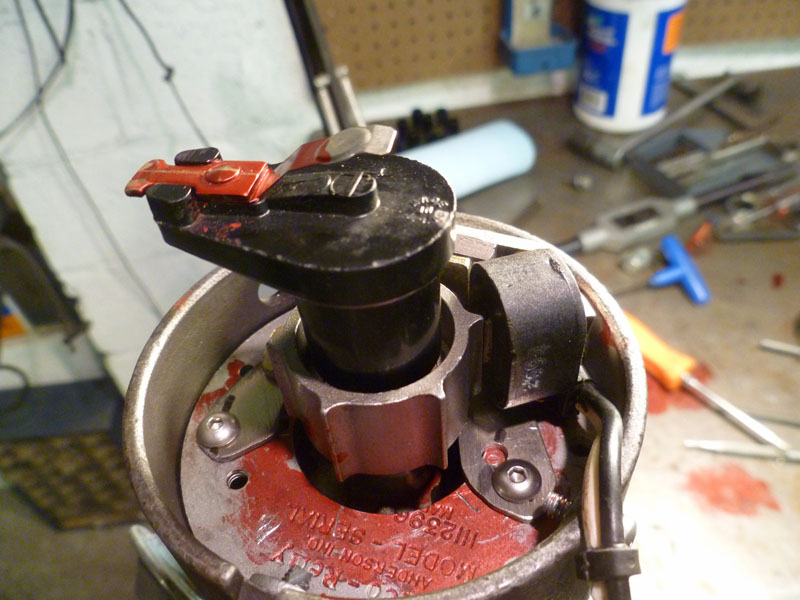
Pickup-to-reluctor gap set at .007″. Note the contact rotor is carried in the original position above the new reluctor.
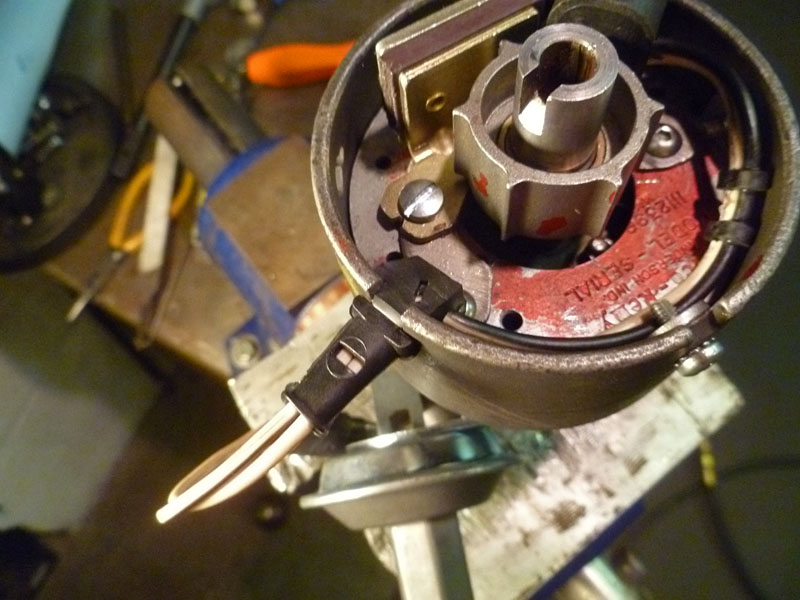
I notched out the distributor body to carry the stock rubber grommet that comes with the pickup. These will allow parts change-out easily without modification should it ever be required. Note the new vacuum can in the bottom of the picture.

This picture shows the new ignition control module mounted on a heat sink on the side of the battery carrier. Not hidden, but not a sore thumb either. Stock purists at car shows might cry or whine upon seeing this. . . but the truck runs spot-on and actually gets used!
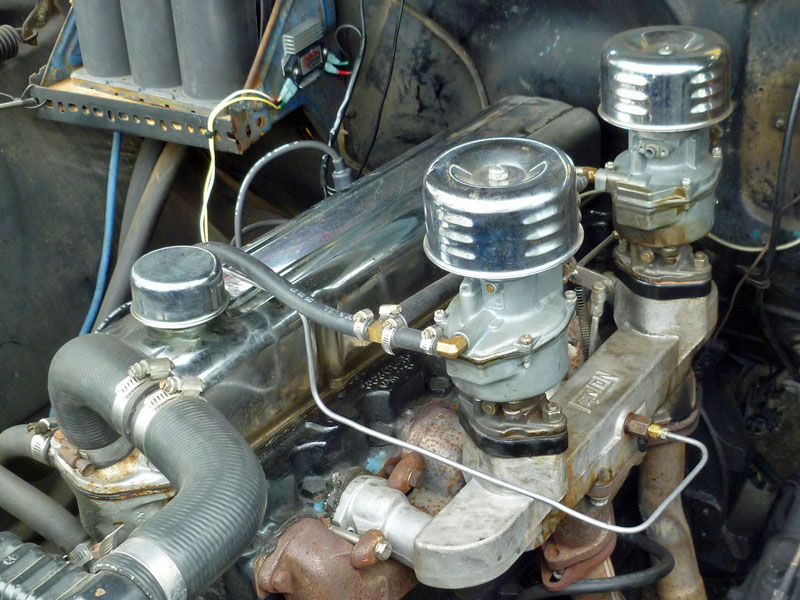
I drilled and tapped the manifold plug for an NPT fitting to use as a vacuum port. I used 3/16″ flare-fitted brake line for the connection to the vacuum can. I tried to make the bends as nicely as I could, but I’m not great at that kind of thing. Works though. Note the dual-carb Fenton intake. Period hotrod shit that probably offers less performance than the trouble it’s worth setting up. On a 235ci Stovebolt it’s like nipples on a toaster . . . makes no damned sense.

very nicely done. even thought i don’t have an old truck or the need to do this sort of conversion i still enjoy reading about things like this. i can tell you put a lot of thought into this conversion, especially keeping it totally serviceable.
Jason,
Great writeup! Can you detail the parts you used? I have a ’59 GMC that I would like to convert to HEI.
Thanks,
Bill
Thanks Bill.
Here is the parts list:
Standard Motor Products LX105 Ignition Reluctor $1.50
Standard Motor Products LX103 Distributor Ignition Pickup $12.59
Speedway Motors 91012338 Stock HEI Replacement Module $14.99
AC Delco 10474610 HEI Module Heat Sink $12.73
Jason
Bill,
The “Speedway Motors 91012338 Stock HEI Replacement Module” contains the harness with a solid state capacitor. Did you use the harness with the capacitor. Is it needed?
Bill,
I’m not aware of any capacitor on the one I used. It was just a small module (as seen in a couple pics in the article) and a pigtail.