
A few of you may of seen the pair of RD350’s I picked up a few weeks ago and there subsequent tear down. This will document the rebuild of the crankshaft. As I type the cases are out in Oregon being vapor blasted HERE, a process similar to glass beading except that its done with a slurry and produces a superior finish that doesn’t stain as easily and looks like the day the part was cast. In the meantime I have been sussing out different things on the bike and gearbox, removing unesscary tabs on the frame and collecting parts for the rebuild.
Having dissembled the the crank to inspect,I found out I would need new connecting rods and bearings in addition to the 4 main bearings that support the crank.
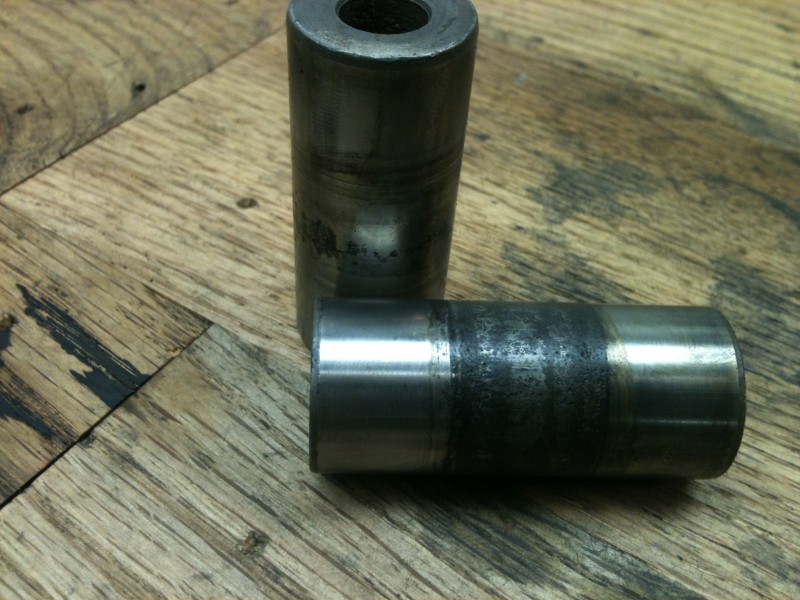
CRANKPINS, the big ends of the rods were just as trashed as well as some bluing form heat
While I neglected to take photos of pressing the crank apart it is almost the same as reassembly.
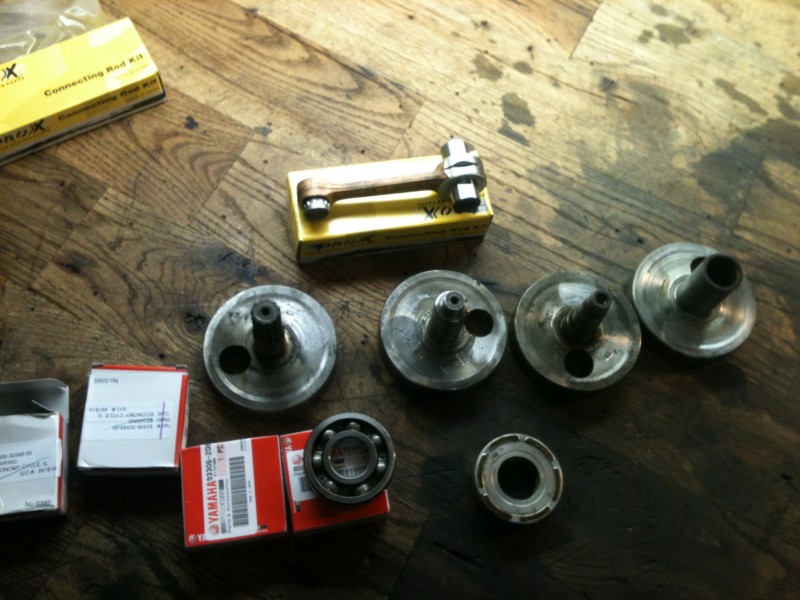
All apart with the pieces that will make it new again, also note the slotted con rod for better oiling
objectives are: Make special fixture to support the crank while pressing it apart and not bend the rods.
Almost fold the press and or explode my push bar to sepiarate the center webs that have been married for 40 years.
Catch crank halves as they fire out the bottom of the press.
All this has been accomplished by the simple fixture I made out of some large square tube with a half a dozen rags stuffed in the end and a plate with an notch cut out for the crank pin to sit.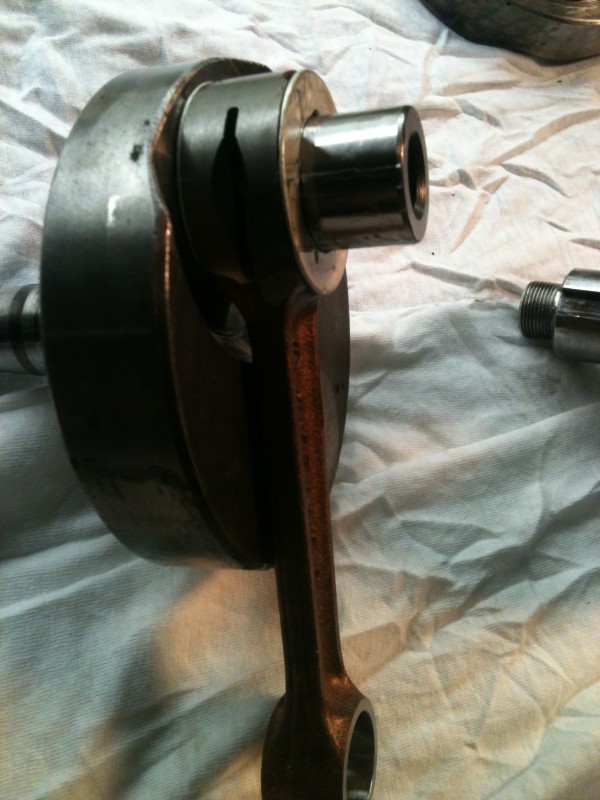
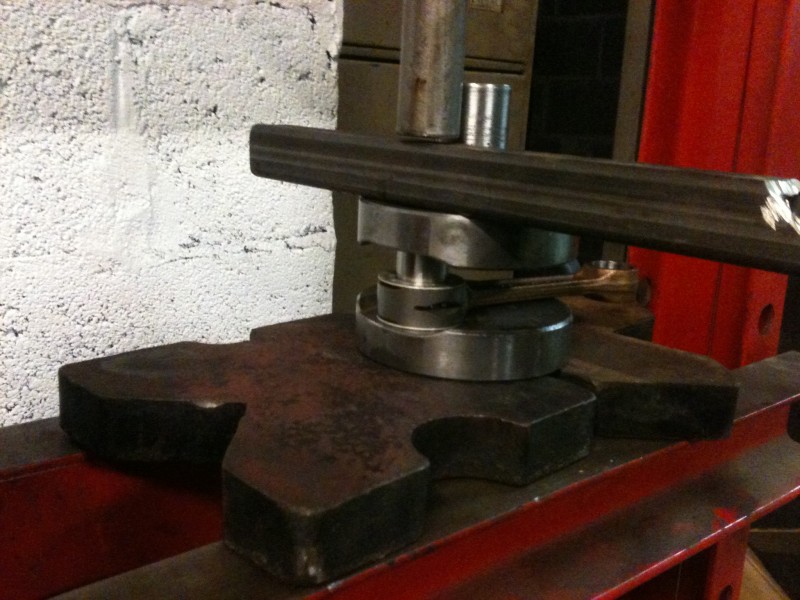
The most difficult part of reassembly is pressing the two sub-assembles together while maintaining the rod side clearance at .001-.003 You can’t see from the pictures how I accomplished this with two pieces of bar between the crank webs. This proved difficult as the clearance I wanted to maintain went away to almost nothing, at least it prevented me from bending the crank pins! Because of this I had to reset the side clearances, not big deal but a little harder than while it was still the sub-assemblys. This is the point where I began to get frustrated and stopped with the photography class. After a bit more futzing around I was left with an assembled crank. Next installment will be truing the crank, STAY TUNED!
Firstly, I think you meant 0.010″ to 0.030″ clearance not 0.001″ to 0.003″ for the side play on the big ends. RD400 shop manual says 0.25 to 0.75 mm.
.
Also, I made a 1/4″ thick very gently tapered wedge out of O-1 tool steel and hardened it to drive in-between crank wheels and pry them apart.
It works well when you need the opposite of whacking it with a big brass hammer.
Good work,
Dave
Dave, Your right, added an extra 0 in there.
Hi!!
From where did you obtain these Pro x con rods??thx!!